| New User Tutorials for ZenCart 1.3.8a |
February 27, 2009 |
|
| ◄BACK | ||
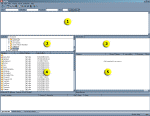
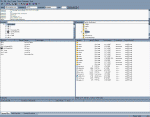
| Adding files for downloadable products Alright, now it's time to play with FileZilla and the FTP some more. This time we're going to be loading our zipped up files to the site so that we can get rid of the little red dot and turn it into a green dot on our products attributes that we did earlier on. Now you need to read the tutorial on Uploading a Template via FTP in order to get any use out of this. It's there that the basics of FileZilla and the process are explained. Read over that if you haven't already and we'll get a move on it now. Instead of the INCLUDES folder, this time we're looking for the DOWNLOAD folder in our ZenCart installation. It's here that we will be dragging and dropping the zip files we find in Pane 4 over to Pane 5 and adding them to the site in order for customers to be able to download them when they make a purchase of a downloadable product on your site. This is a really simple process provided that you have already read the tutorial on uploading a template to the server. Now follow these destructions to add your zipfiles to the site.
|
||
|
--------------------------------------------------------------------------------------------------- |
||


