|
|
|
| New User Tutorials for ZenCart 1.3.9c |
May 2010 |
| ◄BACK | |
| Adding Multiple Pictures to a Products Page ( uses FCK Editor ) Sometimes having just one picture on a products page doesn't help, so it's better to add additional pictures to show your customers more angles, different colours, etc. For this tutorial we'll be adding additional pictures to a products page, in the description area, using FCK Editor. IMPORTANT: If you get an error while trying to upload a picture through this tutorial and FCK Editor says it is unable to perform the action, contact Valhalla Computers or your host to have the upload functions enabled. | |
| --------------------------------------------------------------------------------------------------- | |
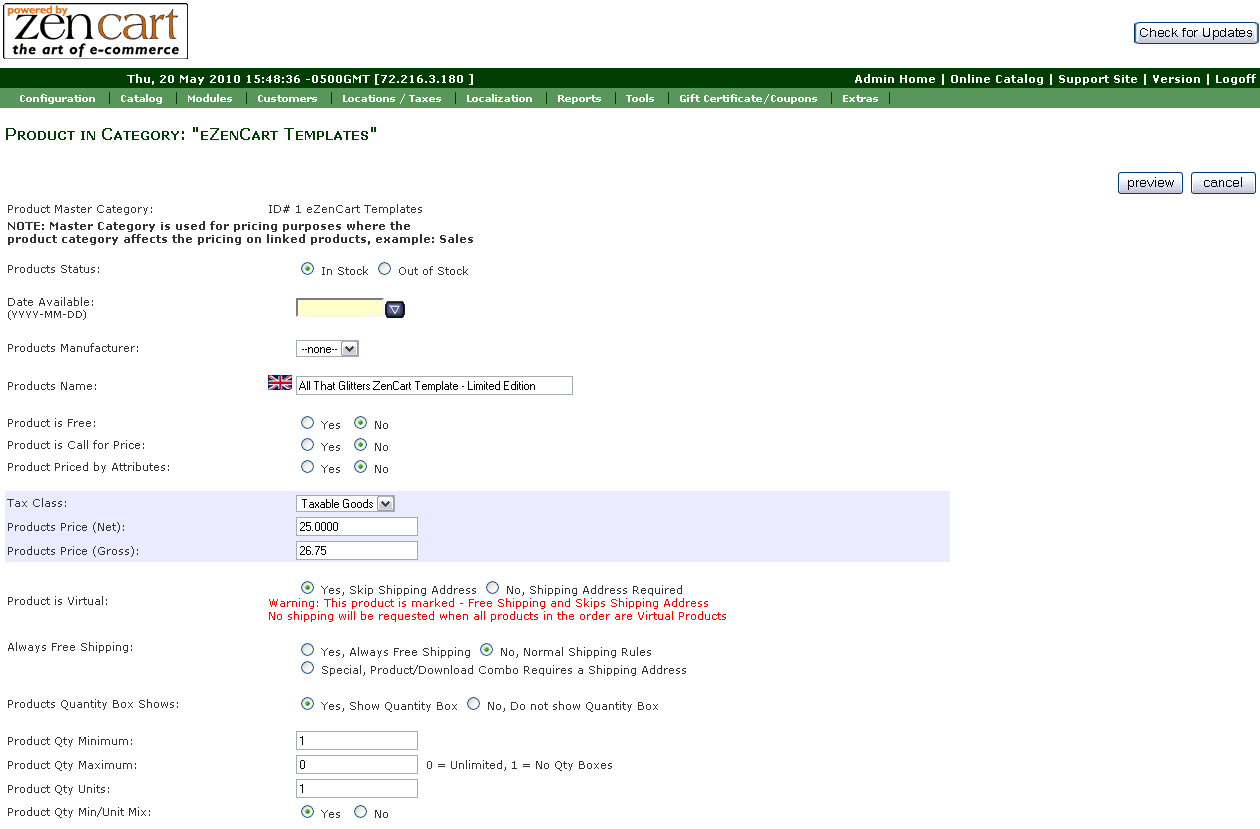
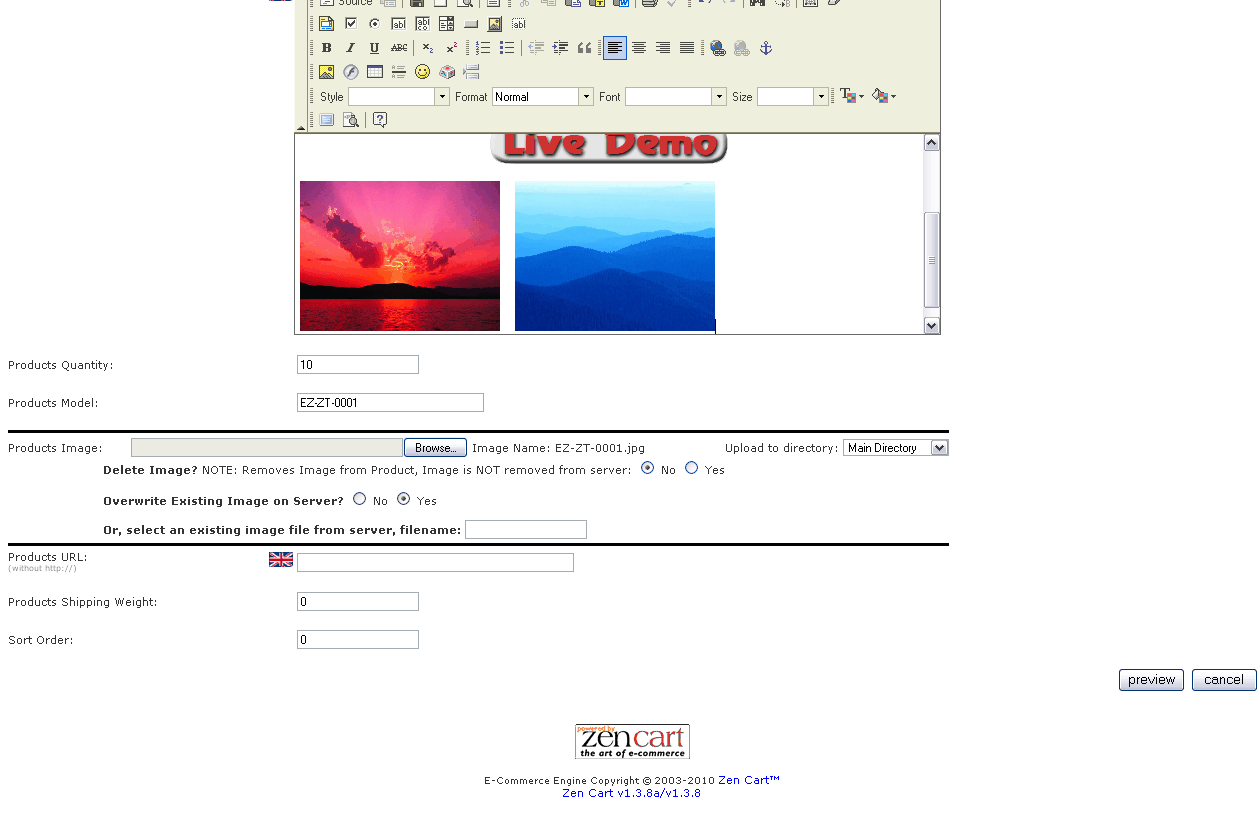
| Step One: Finding what button to use on the FCK Editor We're going to assume at this point you know how to add a product to your site and now want to add more pictures. This can be done when you add a new product or want to go back and edit an existing product. Start by getting to the product page you want to edit then scroll down to where you enter the products description and see the FCK Editor. You'll know you're in the right spot when you see a screen similar to the one in the image to the right ( click for full sized view ). That last image on the right you can see the FCK Editor loaded on the page, there's a #1 on a yellow circle with a thin black line pointing to the icon we'll be using to load up the images. It may not be in the same place but you are looking for the little icon with the mountain looking thing on it. Clicking on this icon will open a new window with which you will be able to load up a new image. | |
| --------------------------------------------------------------------------------------------------- | |
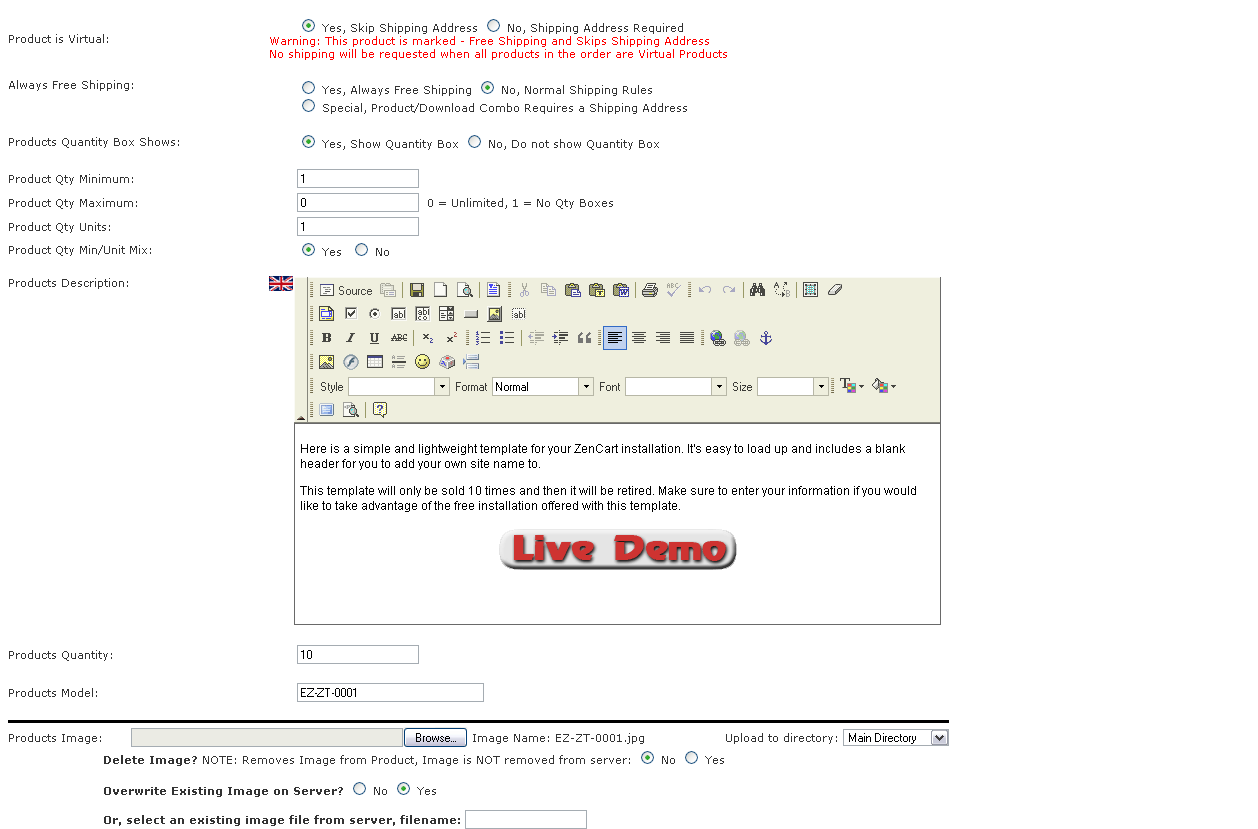
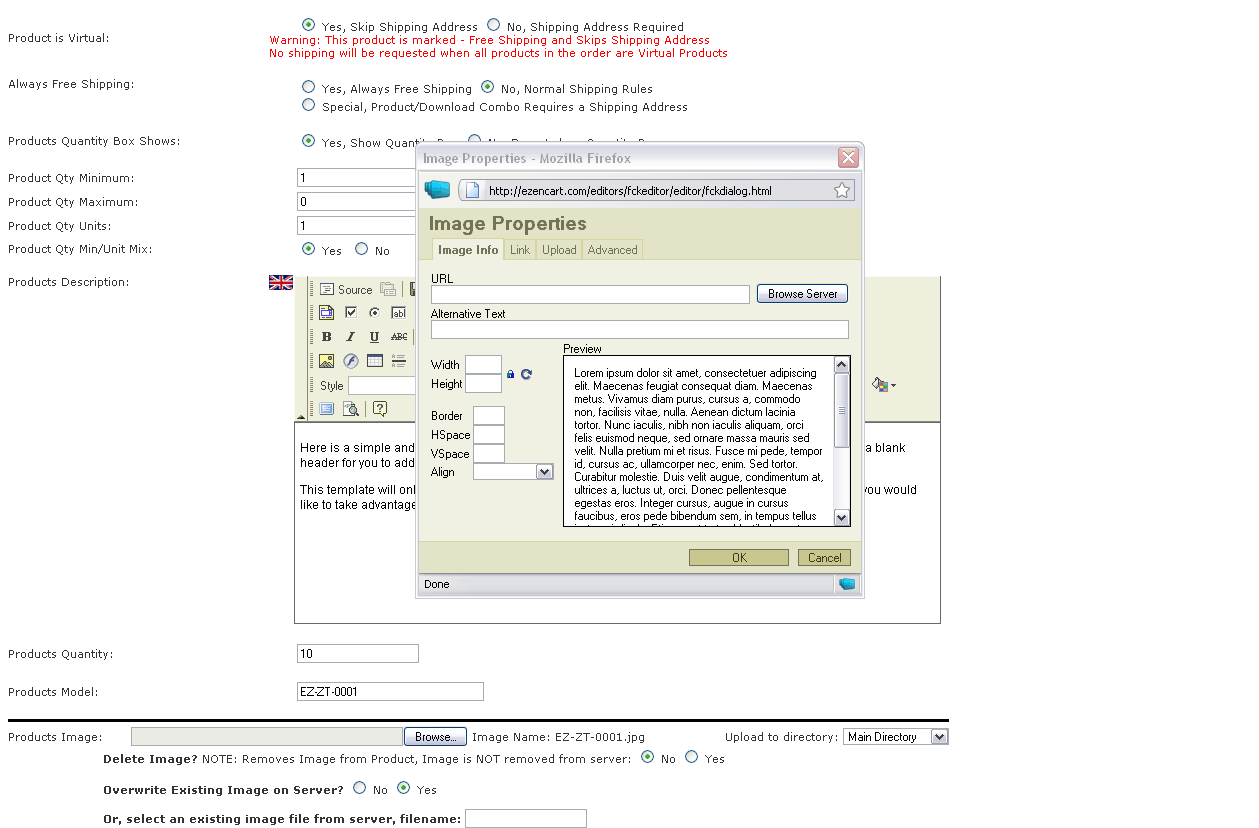
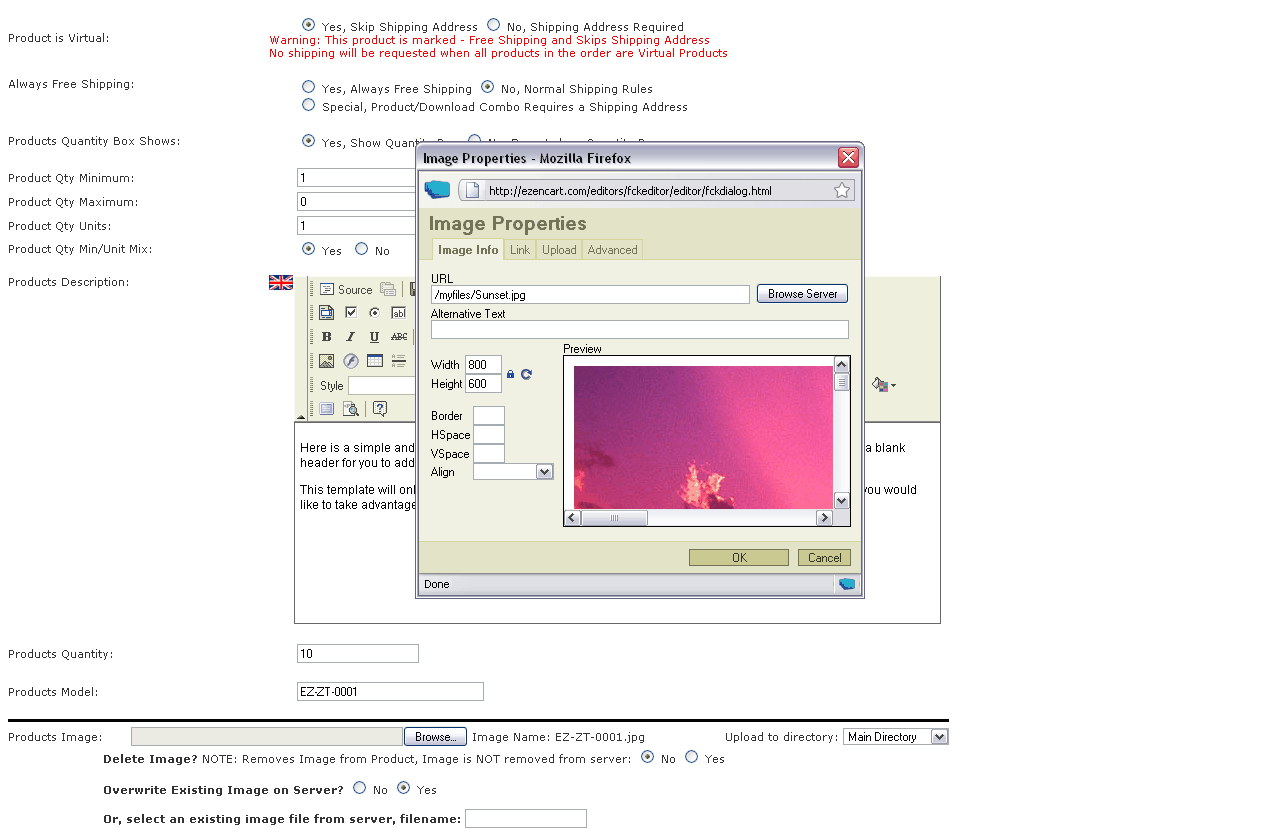
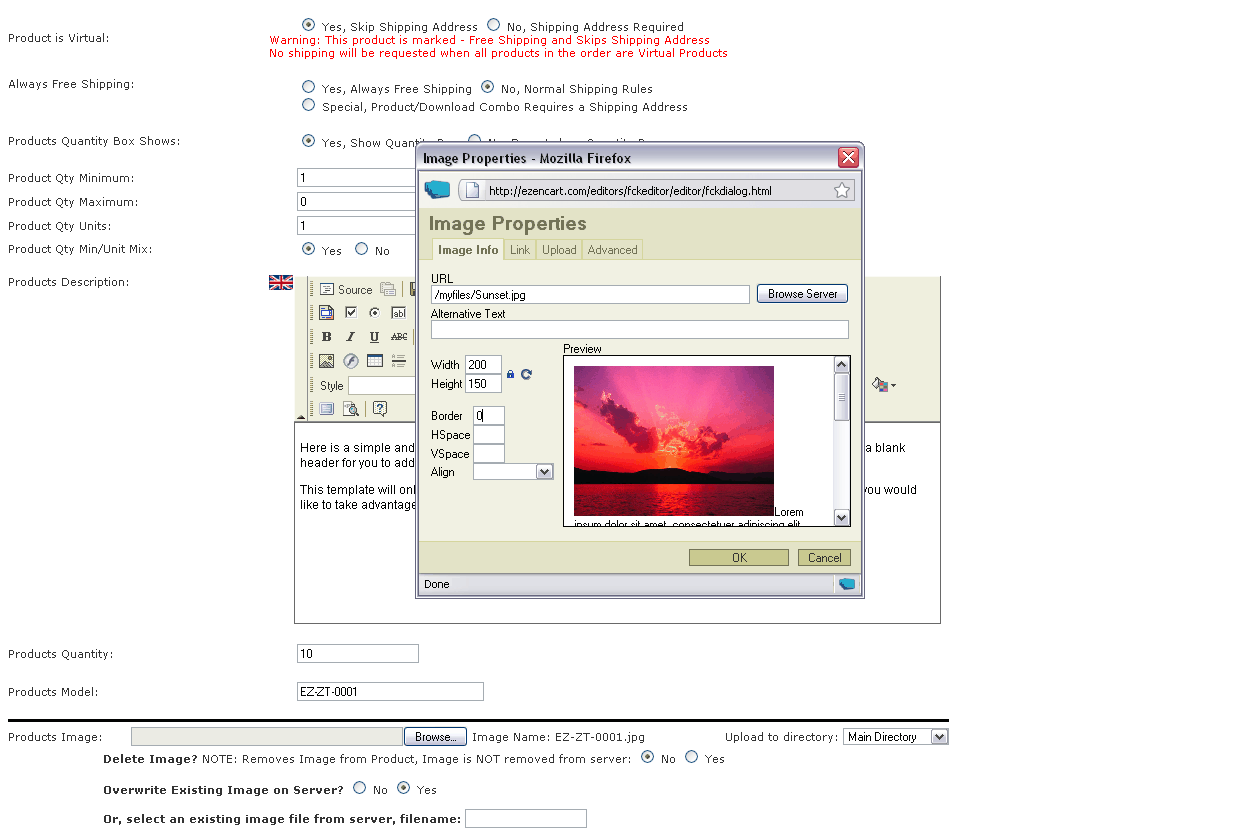
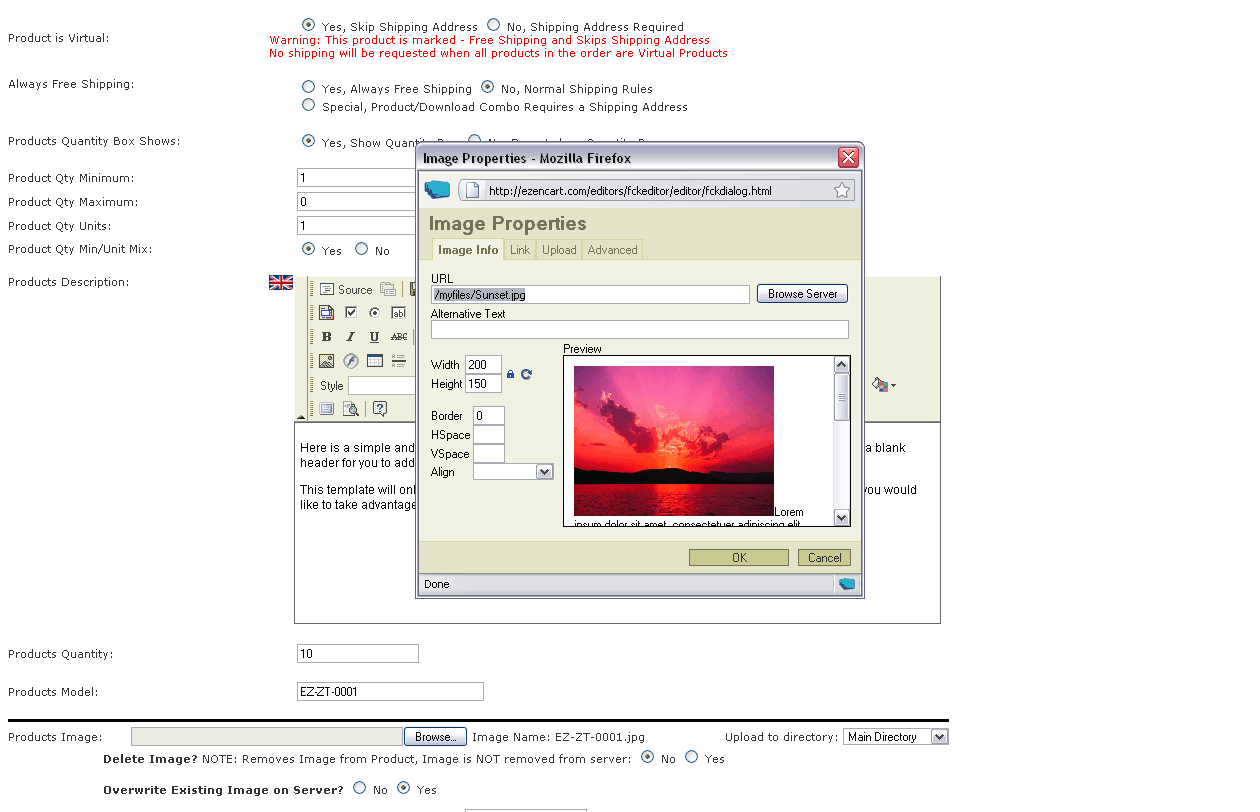
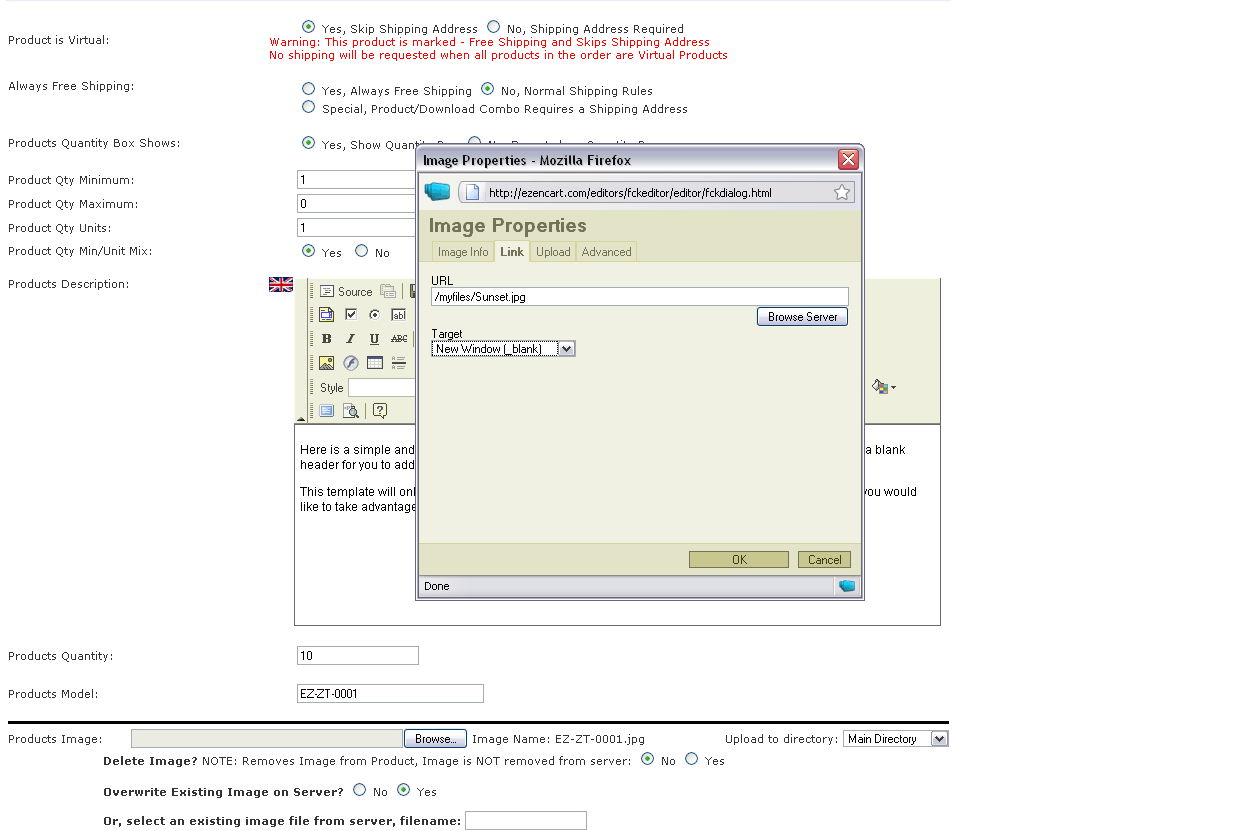
| Step Two: Loading the image you want use using the FCK Editor If you look at the first image to the right of this section you'll see the FCK Editor window. There's 4 tabs located across the top of this window, the one we're interested in at the moment is the one lableled UPLOAD. The second image to the right of this section shows you the upload screen on the FCK Editor. Use the browse button to locate the file on your computer and then click on the SEND IT TO SERVER button to load the image to your site. Some magic will happen now and the image will be loaded up to your site and the FCK Editor will let you know that the image has been loaded up or if it failed. The third image to the right of this section shows you what you should be seeing if everything worked. The fourth image to the right shows you the screen you should be looking at after you click OK on the notice telling you that the image was uploaded. At this point you should make some adjustments to the image to make it fit right on your page. I like to set the size to around 200x150 pixels, and this generally lets me get 3 images across depending on the template and site I'm working on. If you type in 200 in the width box, it will automatically adjust the height to keep the aspect ratio correct and prevent your image from distorting. It's also a good idea to set the border to 0 to prevent the odd coloured border from showing around your images. If you look at the fifth image to the right you'll see my settings I like to use. The next thing to do is link this image so that when people click on it, they can see the full sized image in a new browser window. You do this by copying the filename located under the URL heading, it will say something like: /myfiles/Sunset.jpg. Once you have copied that you can click on the LINK tab located at the top of the window. You can look at the sixth image to the right to see the text highlighted you need. The seventh image to the right shows you what you will see on the LINK screen and here all you need to do is paste the information from the previous page into the URL spot on this page, then below where it says TARGET use the drop down menu to select NEW WINDOW ( _blank ). What this does is allow the FCK Editor to resize the image so it will fit on the page, and then allow people to click on the image to see a fill sized view of it in a new window without losing where they're at on your site. Click on OK and you'll see your image now in the product description. | |
| --------------------------------------------------------------------------------------------------- | |
| Step Three - REPEAT the process for additional images Now that you've got one image loaded up, the process for adding additional images is the same. What I like to is put 5 spaces between my images. So right after the first image is loaded, I press the space bar 5 times and repeat the process of adding an image all over again. You can do this as many times as needed. Some things to note is that you might want to only add 3 images per row to help keep things in order and lined up right. After the 3rd image, just hit the RETURN key and start adding more images. Once you're done adding all your images, click on the | |
| ◄BACK | |