| New User Tutorials for ZenCart 1.3.8a |
February 27, 2009 |
|
| ◄BACK | ||
| Moving Sideboxes / Deleting Sideboxes ZenCart is quite versatile in what you can do to change the look of your shop, especially in what gets seen on the sides of the cart. The sides are actually where a lot of important information and links are found so it's important to have a basic understanding of how to move them around and adjust them. To get started you will need to goto the following: TOOLS > LAYOUT BOXES CONTROLLER
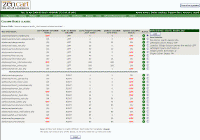
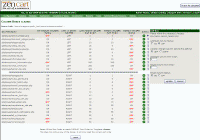
Below are two images, one shows the initial screen you see when you first enter the controller, and the second shows you the panel that opens when you click on the Just a quick rundown of what you see in the first image above:
Now if you click on the little If you look at the second image above you will see two radio buttons, this is where you can turn the box on or off. Turning a box off means it will no longer show on either side of the cart. Below that is the Location with two radio buttons below it, this is where you assign whether the box will be on the left or the right of the cart. That is followed by the Left/Right Column Sort Order, here is where you set whether the box will be at the top or at the bottom of the side it's on. Lower number puts it closer to the top, higher number puts it closer to the bottom. If two boxes have the same sort order then it will default to an alphabetical listing. The next two are still mysteries to me as they haven't shown any changes when I edit them on our carts, to be safe I also turn the last one to off just in case I am missing something and it pops up somewhere I don't know about.
If you're happy with your settings you can click on the There are 3 boxes I always turn off when I setup a cart, that being the Languages, Currencies, and More Information as 9 times out of 10 you won't use these unless you plan to accept payments in different currencies, you've installed additional languages, or you want to torture yourself by trying to figure out how to change the More Information links and pages that go with them.
|
||
|
--------------------------------------------------------------------------------------------------- |
||


